Google App Registration Guide
Google Drive Integration Setup
Written By jazilkalim
Last updated 8 months ago
What is Google Drive Integration?
Google Drive integration allows CampusMindAI agents to access and retrieve knowledge from Google Drive files as part of their knowledge base. When building AI agents in CampusMind, you can connect multiple knowledge sources including OneDrive, Google Drive, and Box to enhance your agent's capabilities.
Why Client App Registration is Required?
Security and Data Control
For Google Drive integration, clients must register their own Google Cloud application rather than using a shared CampusMind app. This architecture ensures:
Data Privacy: Your organization's Drive data is accessed through your own Google Cloud application
Access Control: You maintain complete control over which CampusMind instance can access your data
Compliance: Meets enterprise security requirements by keeping OAuth credentials within your control
Audit Trail: Track and monitor access through your own Google Cloud Console
How Users Experience This
When creating an AI agent in the Agent Builder:
Add Knowledge Source: Select Google Drive as a knowledge base
OAuth Authorization: Users are redirected to Google's OAuth screen
App Authorization: Your registered Google Cloud app requests permission to access Drive
Scoped Access: Each user authorizes access only to their own Drive content
Agent Enhancement: The agent can now search and reference Google Drive documents
How It Works
One-Time Enterprise Setup
IT administrators register a Google Cloud application once for the organization
Configure OAuth credentials with read-only Drive access
Provide credentials to CampusMind administrators
Per-User Authorization Flow
When users add Google Drive to an agent, they authenticate via OAuth
Access is scoped to individual user's Drive only—no cross-user access
Users can revoke access anytime through Google account settings
Prerequisites
Before starting the setup, ensure you have:
[ ] Google Workspace administrator account with Cloud Console access
[ ] IT/security approval to register CampusMind as a trusted application
[ ] Understanding of OAuth and third-party app integration policies
Important Notes
Read-Only Access: This integration uses read-only permissions only. CampusMind agents cannot modify, delete, or create files in Google Drive.
Required for Agent Knowledge: Without this setup, users cannot add Google Drive as a knowledge source when building agents. The integration option will be available but authorization will fail.
Client-Controlled Security: Unlike some integrations, Google Drive requires your organization to create and manage the OAuth application, giving you full control over security and access.
Registration Steps
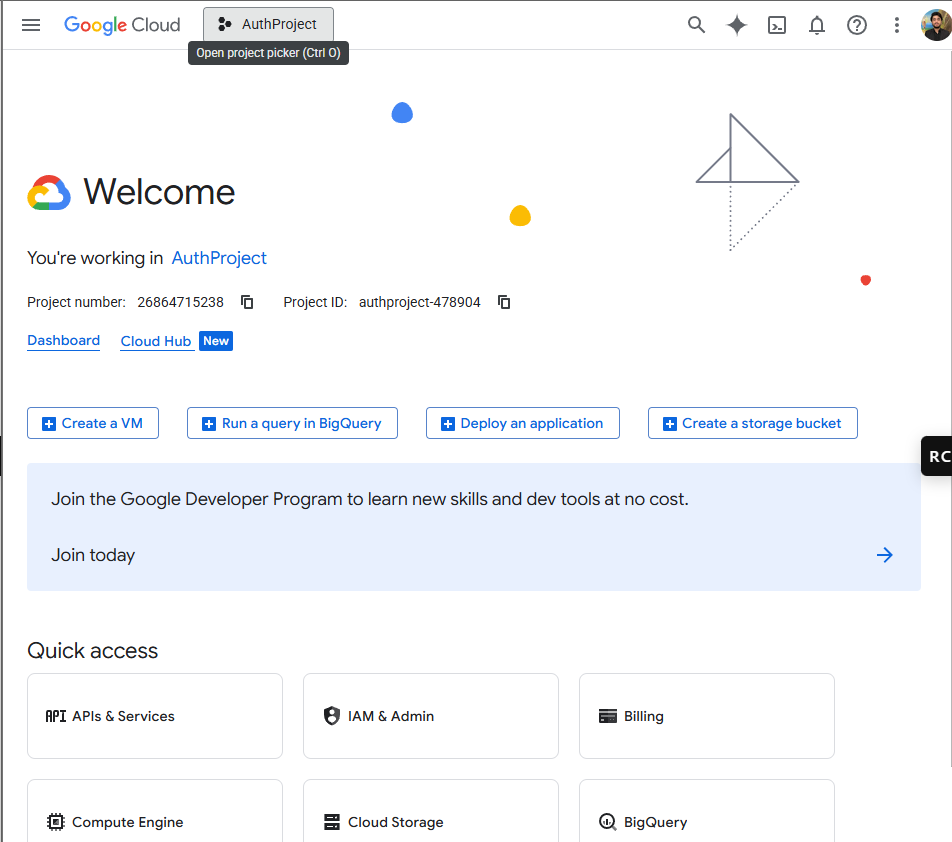
Go to cloud.google.com.
Click Console on the top right to open: https://console.cloud.google.com/welcome
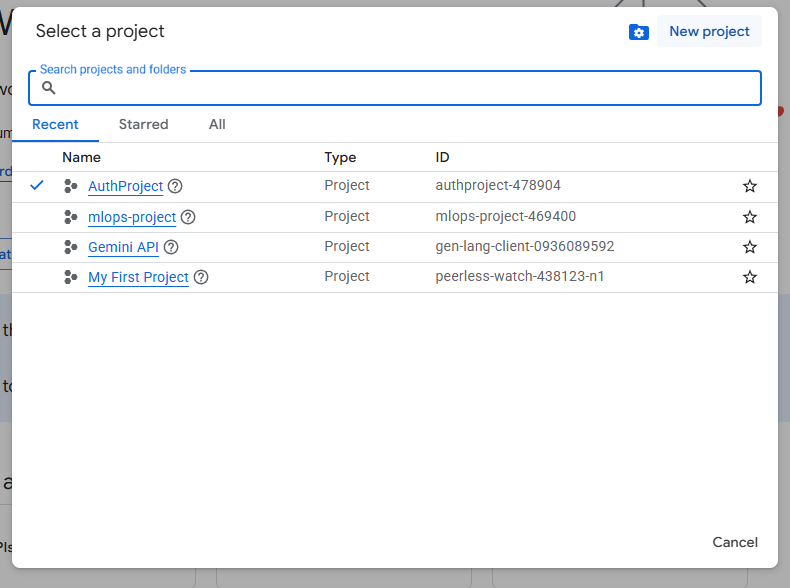
On the top left, click Select Project, and in the popup, choose Create Project.
Click New Project.
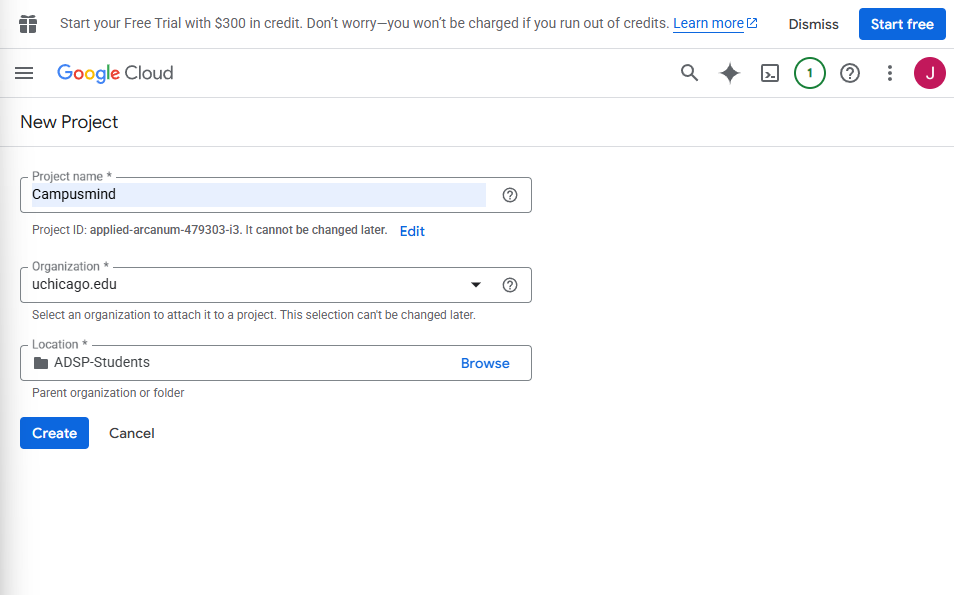
Enter the project name, organization, and location, then create the project.
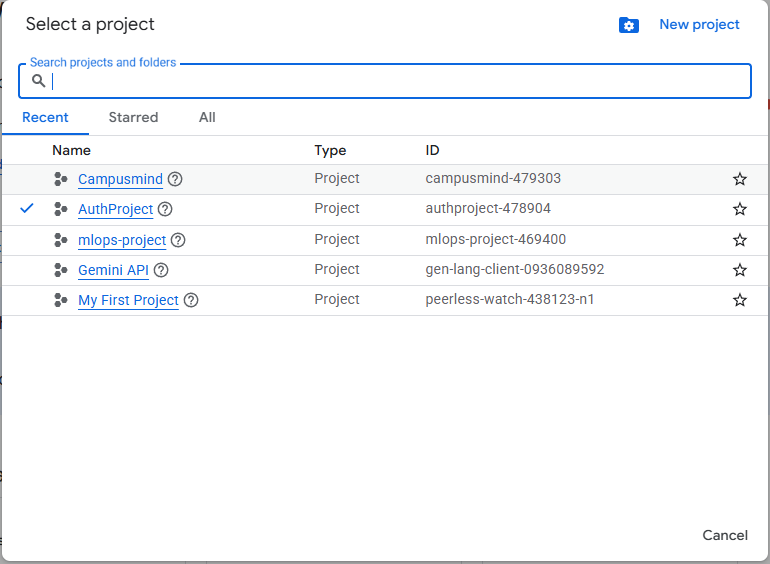
From the home screen, click the project name at the top right again and select your newly created project if it isn't already selected.
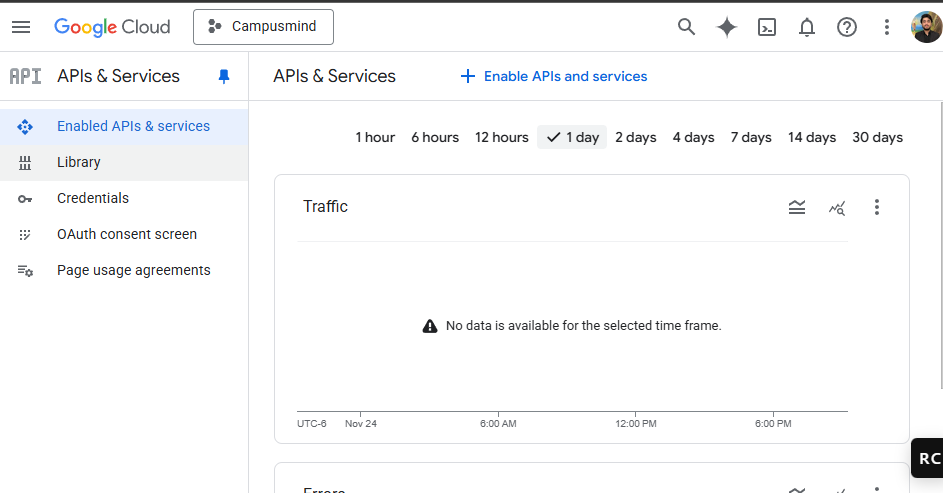
Search for "APIs and Services".
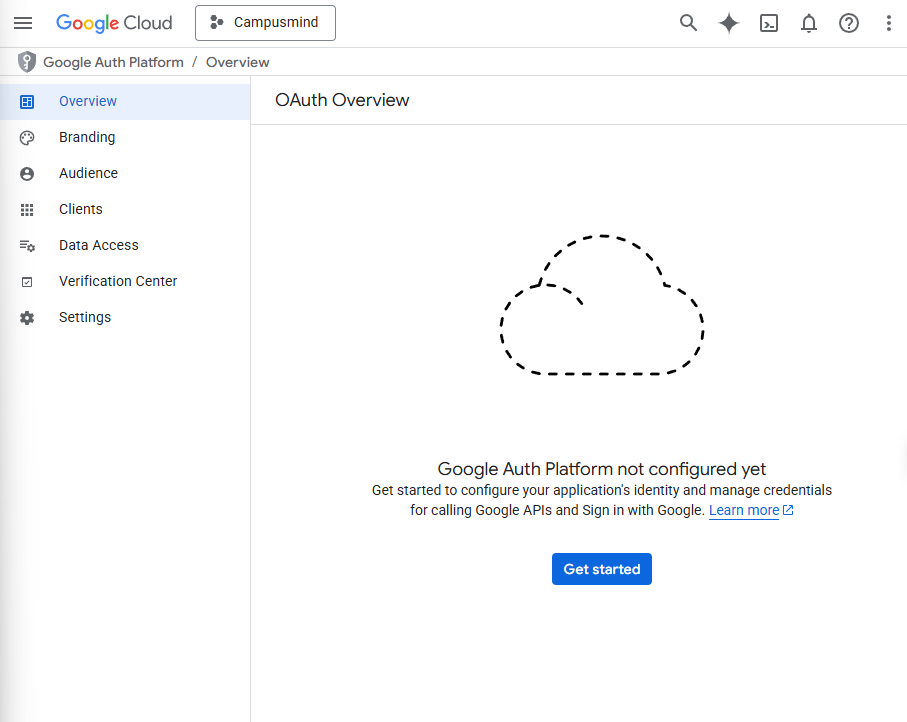
Open it, then go to the OAuth Consent Screen.
You will land on the OAuth Overview page. Click Get Started.
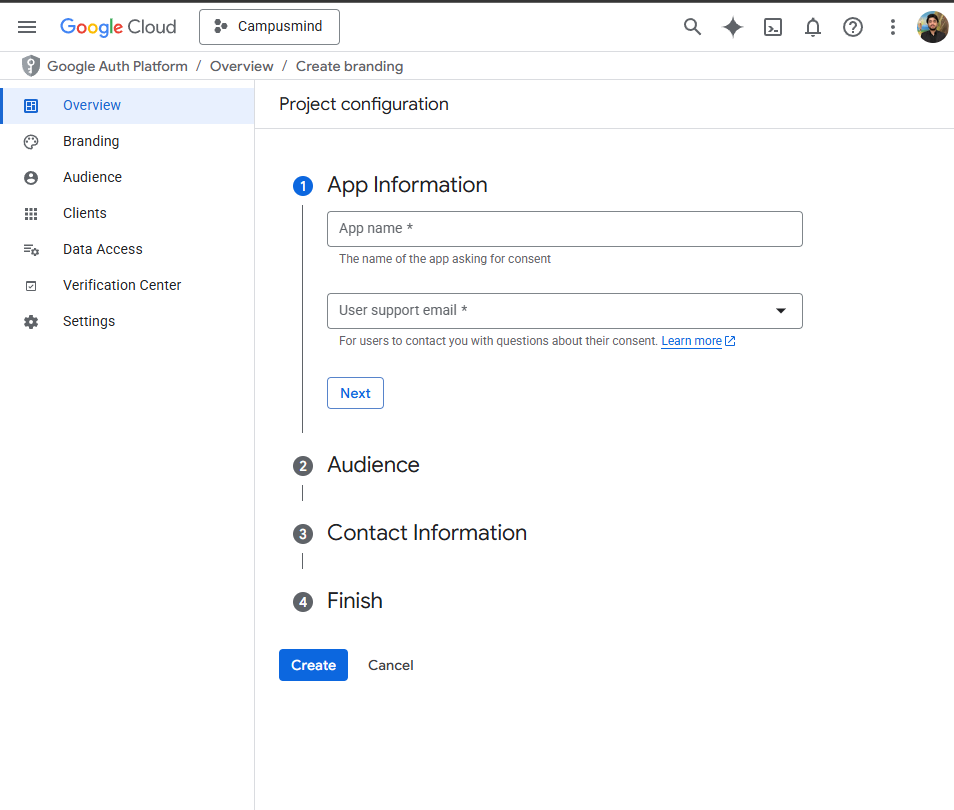
Complete the Project Configuration screens:
App Information
App Name: Campusmind_SchoolName
Email: xyz@gmail.com
Audience
Choose Internal (External works too if Internal access is not available for your email)
Contact
Enter the email where updates about this app should be sent.
Check the terms and conditions, then click Create.
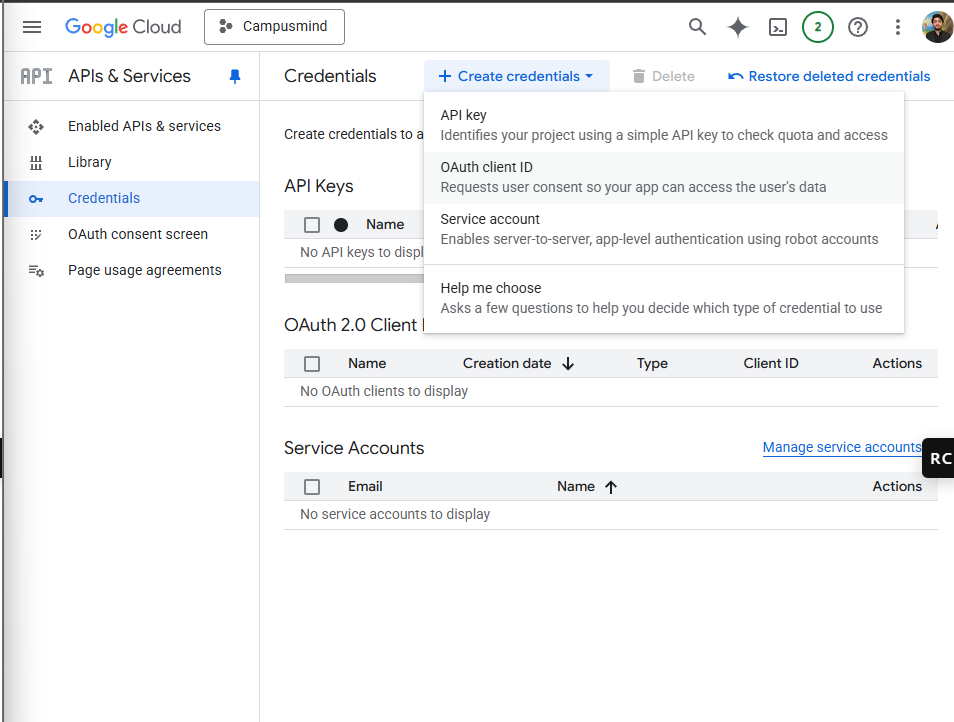
Now search again and open APIs and Services.
Go to Credentials.
Click Create Credentials.
Select OAuth Client ID.
In the Create OAuth Client ID screen:
Application Type: Web application
Name: Web_client1
Authorized JavaScript Origins:
https://app.campusmind.aiAuthorized Redirect URIs:
https://app.campusmind.ai/callback
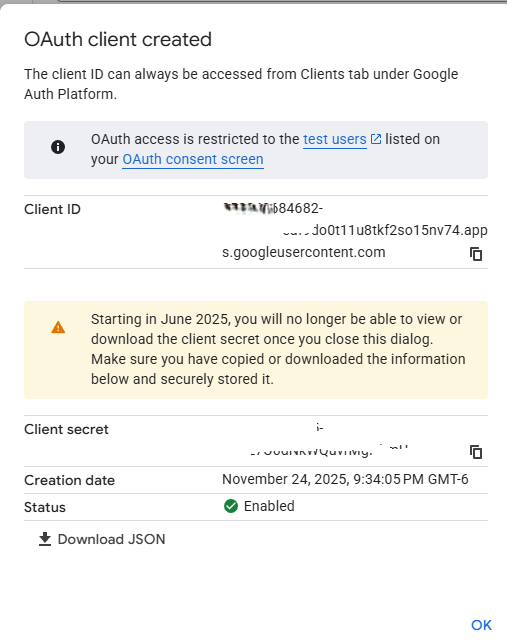
Click Create.
Google will generate a client ID and secret. Download the JSON file and store it securely—you will not be able to view the client ID and secret again if you don't save them.
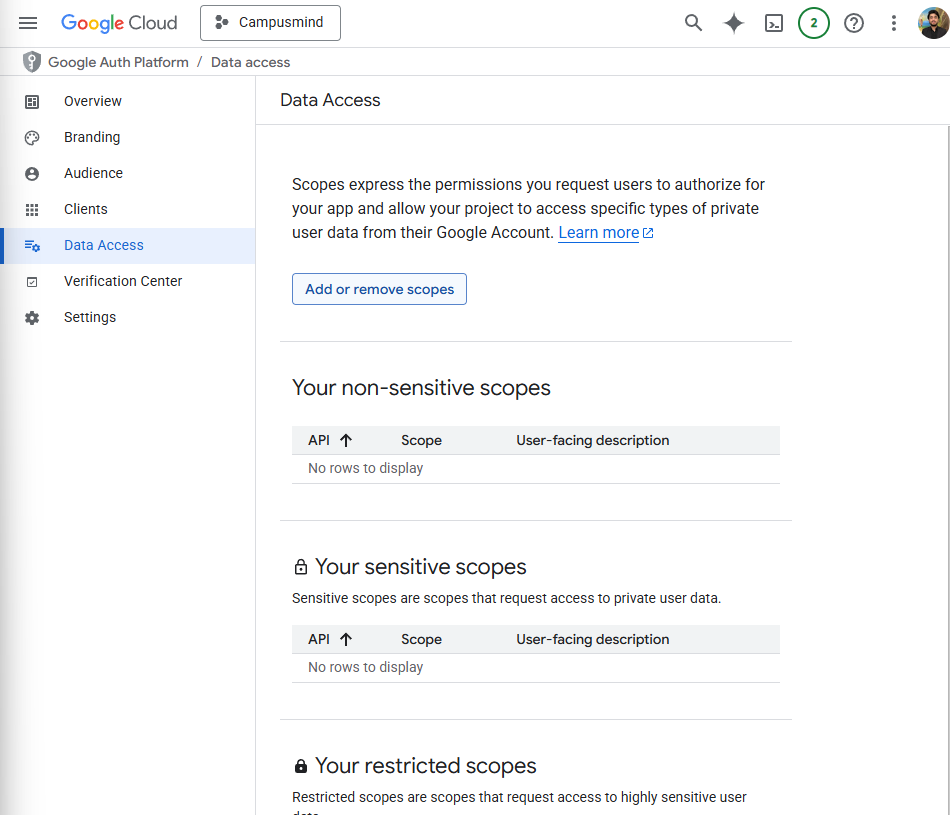
Next, click on your OAuth credential (Web_client1).
In the settings, go to Data Access, then click Add or Remove Scopes.
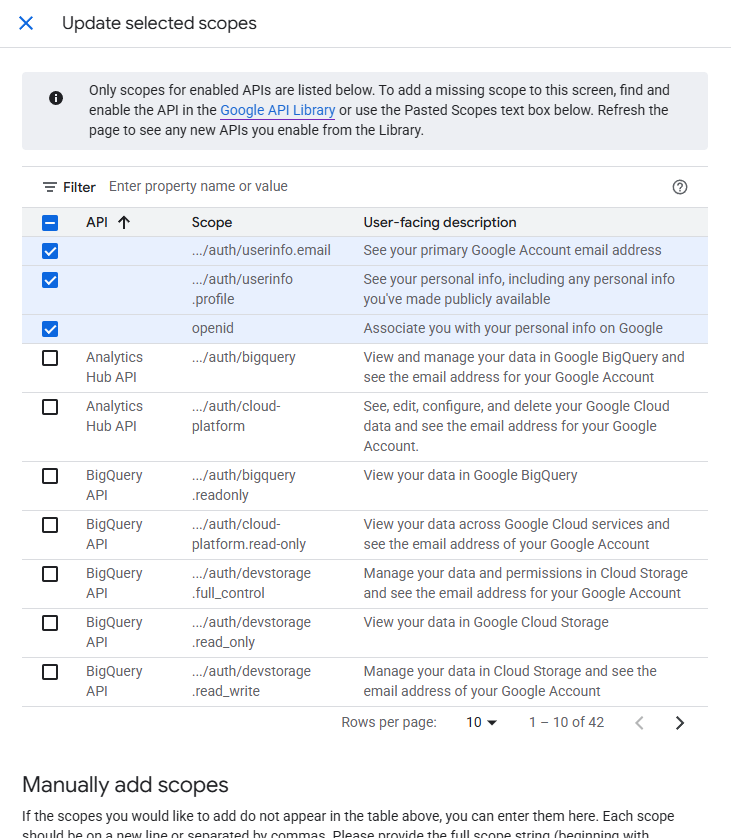
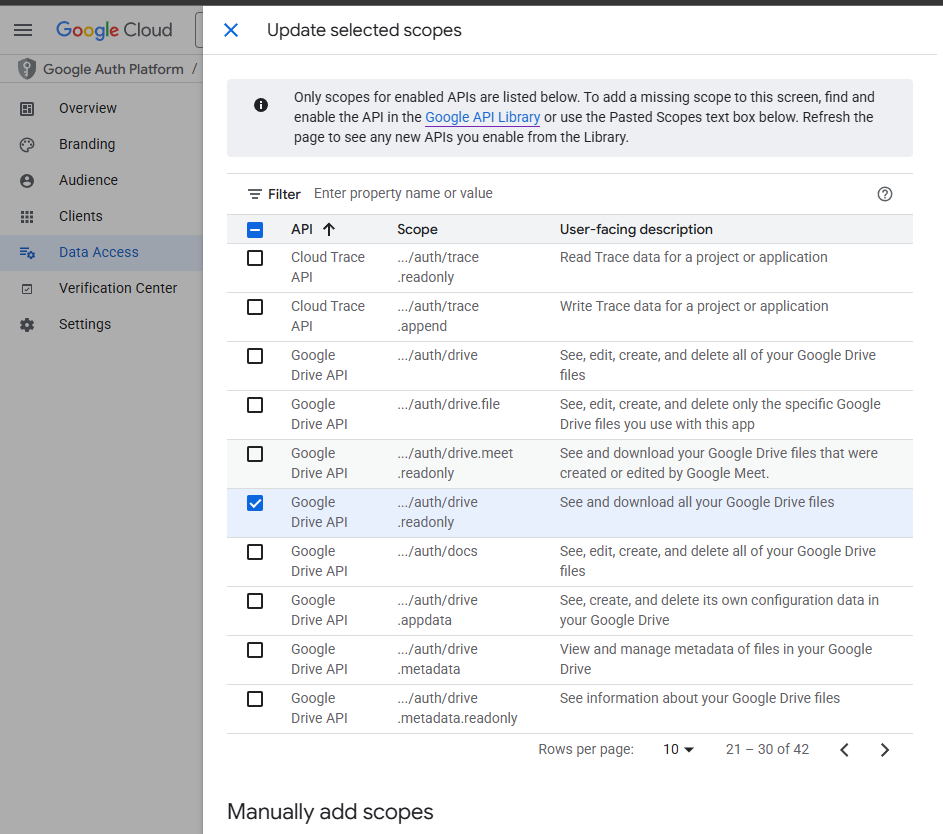
Select these scopes:
auth/userinfo.emailauth/userinfo.profileopenidauth/drive.readonly
If any are missing:
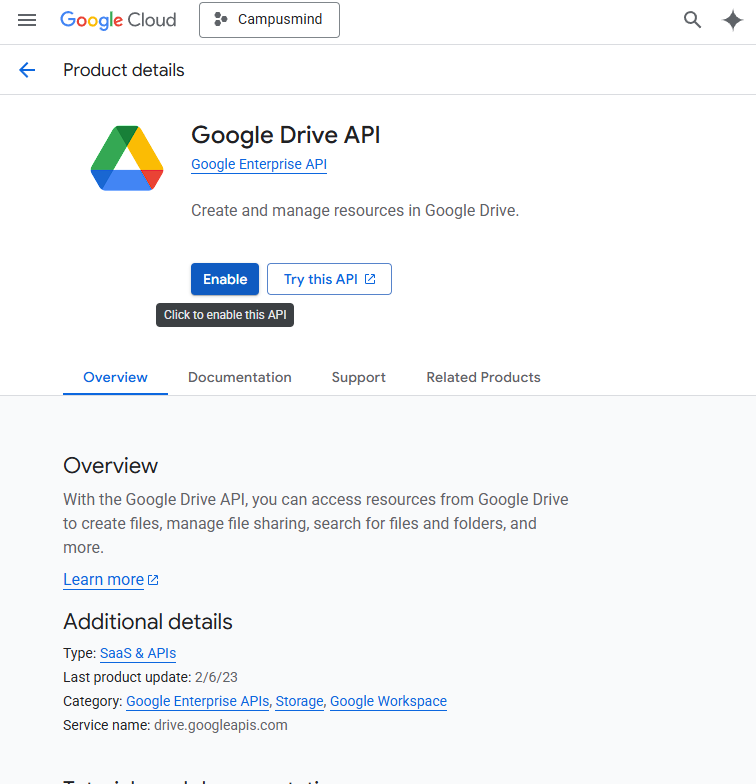
Search for and open the API Library.
Go to Google Drive APIs.
That's all you need to do. Forward the client id and secret securely to Campusmind Application admin.
User-Level Authorization (After Registration)
Once registration is complete, individual users will be prompted to authorize CampusMind agents to access their Google Drive. Here's what happens:
Each agent will prompt individual users to connect their Drive and approve read-only access.
No user can access another user's Drive—security is preserved by design through OAuth scoping.
Users maintain full control over which agents can access their Drive data.
Users can revoke access at any time through their Google account settings.
Need Help?
If you encounter any issues during setup or have questions about the registration process:
Click "Live Chat" on the bottom right to connect with our support team.
Email: support@campusmind.ai
Visit the CampusMind Knowledge Base for additional resources and FAQs.
Tips & Best Practices
Security Reminders
Store credentials securely: Download and save the Client ID and Secret in a secure location immediately after generation. You will not be able to view them again if you don't save them.
Never share credentials: Client IDs and Secrets should only be shared with authorized CampusMind administrators through secure channels.
Use read-only access: Always ensure the Google Drive API is scoped to read-only permissions only. Never grant modification, deletion, or full access permissions.
Review scopes regularly: Periodically review the OAuth scopes configured for CampusMind to ensure only necessary permissions are granted.
Setup Tips
Take screenshots or notes of your Project ID, Client ID, and App Name for reference during agent setup in CampusMind.
Ensure your Google Workspace administrator account has Console access before beginning registration.
Test the OAuth flow with one agent first before rolling out to all agents in your organization.
Document the OAuth registration details in your internal IT wiki or knowledge base for future reference.
Process Complete: Your CampusMind application is now registered as a trusted source for Google Drive integration. You're ready to configure individual CampusMind agents to access Drive content for your users!
Registration Steps
Go to cloud.google.com.
Click Console on the top right to open:
https://console.cloud.google.com/welcome
On the top left, click Select Project, and in the popup, choose Create Project.
Click New Project.
Enter the project name, organization, and location, then create the project.
From the home screen, click the project name at the top right again and select your newly created project if it isn’t already selected.
Search for “APIs and Services”.
Open it, then go to the OAuth Consent Screen.
You will land on the OAuth Overview page.
Click Get Started.
Complete the Project Configuration screens:
App Information
App Name: Campusmind_SchoolName
Email: xyz@gmail.com
Audience
Choose Internal (External works too if Internal access is not available for your email)
Contact
Enter the email where updates about this app should be sent.
Check the terms and conditions, then click Create.
Now search again and open APIs and Services.
Go to Credentials.
Click Create Credentials.
Select OAuth Client ID.
In the Create OAuth Client ID screen:
Application Type: Web application
Name: Web_client1
Authorized JavaScript Origins
https://app.campusmind.ai Authorized Redirect URIs
https://app.campusmind.ai/callback Click Create.
Google will generate a client ID and secret. Download the JSON file and store it securely—you will not be able to view the client ID and secret again if you don’t save them.
Next, click on your OAuth credential (Web_client1).
In the settings, go to Data Access, then click Add or Remove Scopes.
Select these scopes:
auth/userinfo.emailauth/userinfo.profileopenidauth/drive.readonly
If any are missing:
Search for and open the API Library.
Go to Google Drive APIs.
That’s all you need to do. Forward the client id and secret securely to Campusmind Application admin.
User-Level Authorization (After Registration)
Once registration is complete, individual users will be prompted to authorize CampusMind agents to access their Google Drive. Here's what happens:
• Each agent will prompt individual users to connect their Drive and approve read-only access. • No user can access another user's Drive—security is preserved by design through OAuth scoping. • Users maintain full control over which agents can access their Drive data. • Users can revoke access at any time through their Google account settings.
Need Help?
If you encounter any issues during setup or have questions about the registration process:
• Click "Live Chat" on the bottom right to connect with our support team. • Email: support@campusmind.ai • Visit the CampusMind Knowledge Base for additional resources and FAQs.
Tips & Best Practices
Security Reminders:
• Store credentials securely: Download and save the Client ID and Secret in a secure location immediately after generation. You will not be able to view them again if you don't save them. • Never share credentials: Client IDs and Secrets should only be shared with authorized CampusMind administrators through secure channels. • Use read-only access: Always ensure the Google Drive API is scoped to read-only permissions only. Never grant modification, deletion, or full access permissions. • Review scopes regularly: Periodically review the OAuth scopes configured for CampusMind to ensure only necessary permissions are granted.
Setup Tips:
• Take screenshots or notes of your Project ID, Client ID, and App Name for reference during agent setup in CampusMind. • Ensure your Google Workspace administrator account has Console access before beginning registration. • Test the OAuth flow with one agent first before rolling out to all agents in your organization. • Document the OAuth registration details in your internal IT wiki or knowledge base for future reference.
Process Complete: Your CampusMind application is now registered as a trusted source for Google Drive integration. You're ready to configure individual CampusMind agents to access Drive content for your users!